Comprehensive Guide to Servicing Extractor Fans
January 25 2025Cooker Element Replacement: Cost, DIY Tips, and When to Call a Pro
When your cooker element, the heating part inside an electric oven or hob that glows red when powered. Also known as oven heating element, it's the part that actually makes your oven hot. If it’s broken, your cooker won’t heat—no matter how many times you turn the dial. It’s not a mystery. It’s a simple part that wears out, just like a lightbulb. You might notice the element doesn’t glow, your food cooks unevenly, or the oven trips the circuit breaker. These aren’t signs your whole cooker is dead—they’re signs the element needs replacing.
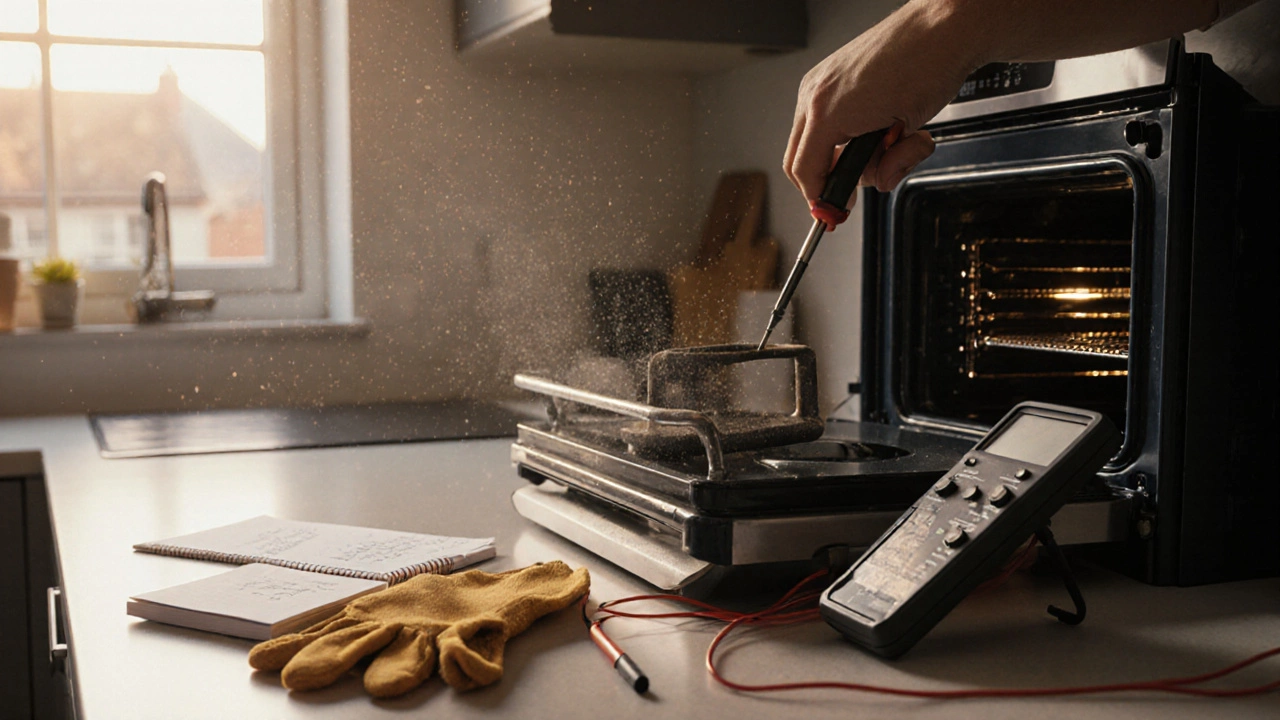
Replacing a cooker element isn’t rocket science, but it does require safety steps. You’re dealing with 240 volts, so turning off the power at the mains isn’t optional. A faulty oven element is one of the most common reasons electric cookers stop working. In fact, over 60% of cooker repair calls we see in Bedford are just for this one part. The good news? The part itself usually costs under £50. Labor? If you hire someone, expect £80–£150 depending on how easy it is to access the element. Do it yourself and you’re only paying for the part and maybe a new screwdriver.
Some people think they need a specialist to swap it out. You don’t. Most cookers have a simple screw-in design. You remove the back panel, unplug the old element, plug in the new one, and screw it back in. The tricky part? Making sure you get the right replacement. Elements vary by wattage, shape, and mounting style. A standard 2kW element won’t fit a 3kW model. Check the model number on your cooker’s plate or look up the part online using your brand and serial number. Don’t guess. A wrong part won’t just not work—it could damage your cooker or cause a fire.
And yes, it’s worth fixing. If your cooker is under 10 years old and everything else works—the lights, the timer, the hob—replacing the element makes more sense than buying a whole new appliance. A new cooker can cost £500 or more. A new element? Under £100 total. Even if you pay for professional help, you’re saving hundreds.
But here’s the catch: if your element keeps blowing, there’s another problem. Maybe your thermostat is stuck, or the wiring is frayed. Replacing the element without checking those could mean you’re just buying a new part to blow again. That’s why some repair guides suggest testing the thermostat and checking the wiring connections before you start. If you’re not comfortable with that, call a certified engineer. They’ll test the whole circuit, not just swap the part.
What you’ll find below are real stories from people who’ve dealt with this exact issue. Some fixed it in 20 minutes. Others spent hours guessing what was wrong before they figured out it was the element. There are cost breakdowns, step-by-step safety checks, and tips on how to avoid buying the wrong part. Whether you’re planning to do it yourself or just want to know if you’re being overcharged, this collection gives you the facts—not the fluff.
 17 Nov
How to Repair a Damaged Cooker: Step-by-Step Fixes for Common Issues
Fix a damaged cooker without replacing it. Learn how to check power, replace heating elements, test thermostats, and prevent future damage with simple DIY steps.
Read More...POPULAR POSTS


Is Food Still Safe When the Freezer Stops Working?
April 10 2025
What Is the Most Common Problem with a Hot Water Heater?
January 26 2026